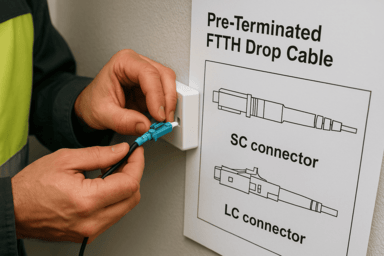
Pre-Terminated FTTH Drop Cable Assembly Guide
I cut my teeth on a large MDU project where fusion splicing dozens of drop cables nearly derailed our schedule. That taught me one thing: time is money. I switched to pre-terminated FTTH drop cable assemblies. Factory-installed connectors and tested loss meant we just plug in and go. In this guide, I’ll walk you through every step—from components to testing—to help you master optical fiber assembly and streamline your installs.
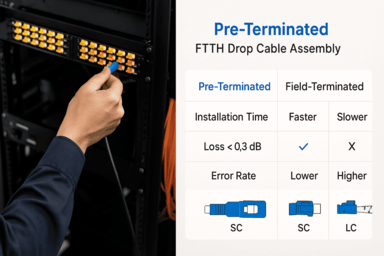
Advantages of Pre-Terminated Assemblies
- Speed: No field splicing. Install crews finish runs in hours, not days.
- Quality: Factory-tested loss < 0.3 dB per connector.
- Reliability: Consistent polish and connector quality from fiber optic patch cord manufacturer labs.
- Reduced Errors: Fewer field terminations. Fewer faults.
I remember a job where 100 field splices cost us two extra days. With pre-terminated assemblies, I cut that to zero.
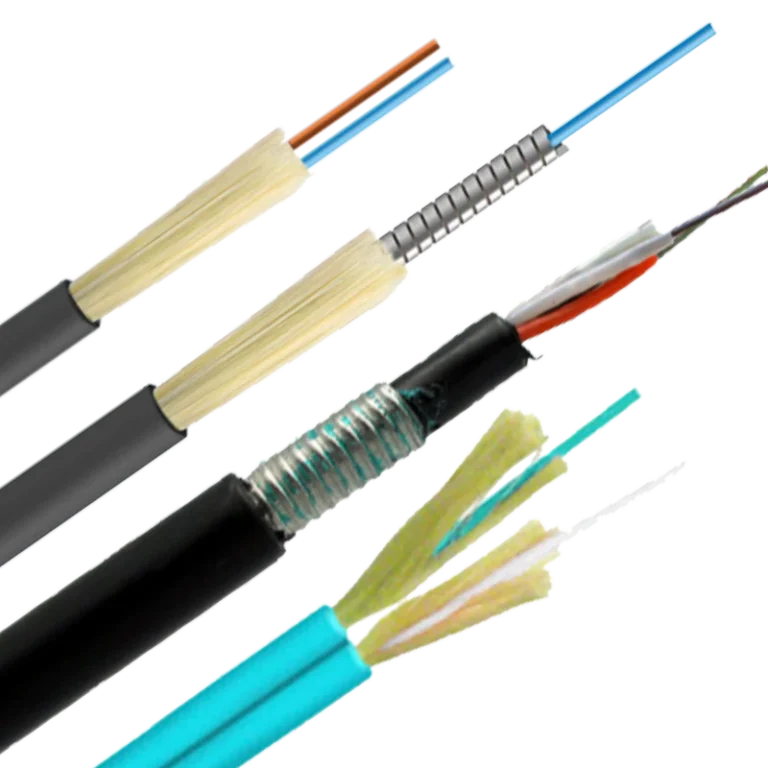
Assembly Components
| Component | Purpose | Keywords |
|---|---|---|
| Pre-Terminated Drop Cable | Main link with factory FC/SC/LC connectors | FTTH Drop Cable, Fiber Optic Cable Assembly |
| Breakout or Patch Cord | Connects to ONT or splice tray | Fiber Optic Patch Cord Manufacturer, Patch Cable Supplier |
| Connector Type | LC (duplex), SC (simplex), or FC | Fiber Optic Cable Assembly Manufacturers |
| Splice Tray or Cassette | Organizes any fusion splices if needed | Optical Fiber Assembly |
| Dust Caps & Boots | Protect ferrules before and after install | Rugged Fiber Optic Cable |
Connector Options
I reviewed these in my lab before rolling out to site.
| Connector | Features | Use Case |
|---|---|---|
| LC Duplex | Small form factor, duplex | High-density indoor racks |
| SC Simplex | Snap-in, robust | Outdoor splice closures |
| FC | Threaded, low back-reflection | Lab or test environments |
Why Form Factor Matters
- LC fits in tight panels.
- SC snaps in easily outdoors.
- FC locks tight for tests.
Matching to Devices
| Device Type | Recommended Connector | Notes |
|---|---|---|
| ONT | LC Duplex | Meets most consumer ONTs |
| Outdoor Closure | SC Simplex | IP-rated boots available |
| Test Equipment | FC | Threaded coupling holds steady |
On-Site Assembly Workflow
I follow this every time. It saved me from callbacks.
- Pre-Install Inspection
- Check connectors for scratches or debris.
- Verify part numbers and lengths.
- Connector Cleaning
- Use a dry-cassette cleaner on each ferrule.
- Inspect under a 200× scope or microscope pen.
- Mating & Securing
- Align and insert connectors into outlets or adapters.
- Torque threaded connectors (0.5 N·m for FC).
- Strain Relief
- Engage retention clips or boots on patch panels.
- Use cable ties or Velcro to secure runs.
- Labeling
- Apply pre-printed labels or write on markers.
- Log each port’s ID in your spreadsheet or OSP map.
On-Site Checklist
| Step | Tool/Material | Tip |
|---|---|---|
| Inspection | Microscope pen | Use bright LED light to spot scratches |
| Cleaning | Dry cassette cleaner | Clean before every connection |
| Securing | Cable ties, retention clips | Don’t over-tighten—avoid deforming the cable |
| Labeling | Pre-printed markers | Use permanent, waterproof marker outdoors |
I once missed a label on port 12. It cost me an hour to trace.
Testing Protocols
Testing is non-negotiable. I learned that the hard way when a customer reported a bad link after I left site.
- Insertion Loss (IL) Test
- Use OLTS or handheld power meter.
- Compare to factory spec (≤ 0.3 dB/connector).
- Reflectance (ORL) Test
- Ensure back-reflection ≤ −50 dB on SM connectors.
- Polarity Check
- Confirm Tx→Rx mapping matches ONT or splitter.
- Visual Fault Locator (V-FL)
- Trace fiber path. Detect breaks or macro-bends.
Sample Test Results
| Fiber ID | IL (dB) | ORL (dB) | Pass/Fail | Notes |
|---|---|---|---|---|
| 1 | 0.22 | −55 | Pass | Clean connector |
| 2 | 0.25 | −52 | Pass | Minor macro-bend fixed |
| 3 | 0.30 | −50 | Pass | At tolerance limit |
I log these in a report. It saves arguments later.
Quality Control Checklist
Before I sign off, I confirm:
- All connectors clean and mated properly.
- Loss and reflectance within tolerance.
- Polarity correct on every link.
- Cables routed neatly with strain relief.
- Documentation updated with test data.
Pro tip: Keep a spare pre-terminated patch cord in your van. It’s a lifesaver for hot swaps.
FAQ
Q1: Can I field-splice pre-terminated drop cables?
A1: Yes. Use a splice closure and fusion splice tray. Then transition back to a factory-terminated pigtail.
Q2: What connector types work best for outdoor splice closures?
A2: SC simplex or ruggedized LC/APC with IP-rated boots.
Q3: How do I handle polarity on pre-terminated assemblies?
A3: Use key-up/key-down or color-coded boots. Verify with a polarity tester before closing.
Q4: What if my test shows high insertion loss?
A4: Clean connectors again. Retest. If still high, replace the cable or pigtail.
Q5: How long should I wait after cleaning to test?
A5: Test immediately. Dust can settle quickly.
Conclusion
Pre-terminated FTTH drop cable assemblies save time. They cut errors. They deliver consistent quality. By inspecting, cleaning, securing, and testing, you can finish builds faster. You will get fewer callbacks. For custom lengths, OEM options, or bulk optical fiber assembly needs, contact me, Sophie Wang at AIMIFIBER. Let’s streamline your next FTTH deployment.